No Products in the Cart

 German
 French
 Italian

Prepare materials and tools: You will need the mirror dashcam itself, a power cable (usually including a cigarette lighter adapter or a hard - wiring kit), a trim removal tool (for hiding cables), cable clips or adhesive tape (for securing wires), and a micro SD card (Class 10, at least 32GB).
Clip-On Mirror Dashcam
Example Model: MERCYLION M9661

Select The Installation Position: It is generally recommended to install the mirror dashcam in the center of the windshield, directly behind the rear - view mirror. This position can ensure a good shooting perspective and minimize blind spots, while also not obstructing the driver's view.

Strap - On Installation
First, clean the rear - view mirror to remove dust or grease. Then, place the dashcam against the rear - view mirror, aligning it so that the camera has an unobstructed view. Next, wrap the silicone straps around the rear - view mirror and fasten them tightly. Finally, adjust the dashcam to ensure it captures the desired field of view.
Insert the micro SD Card
Turn off the mirror dashcam, open the micro SD card slot cover, gently push the micro SD card into the slot until it locks into place, and then close the cover.
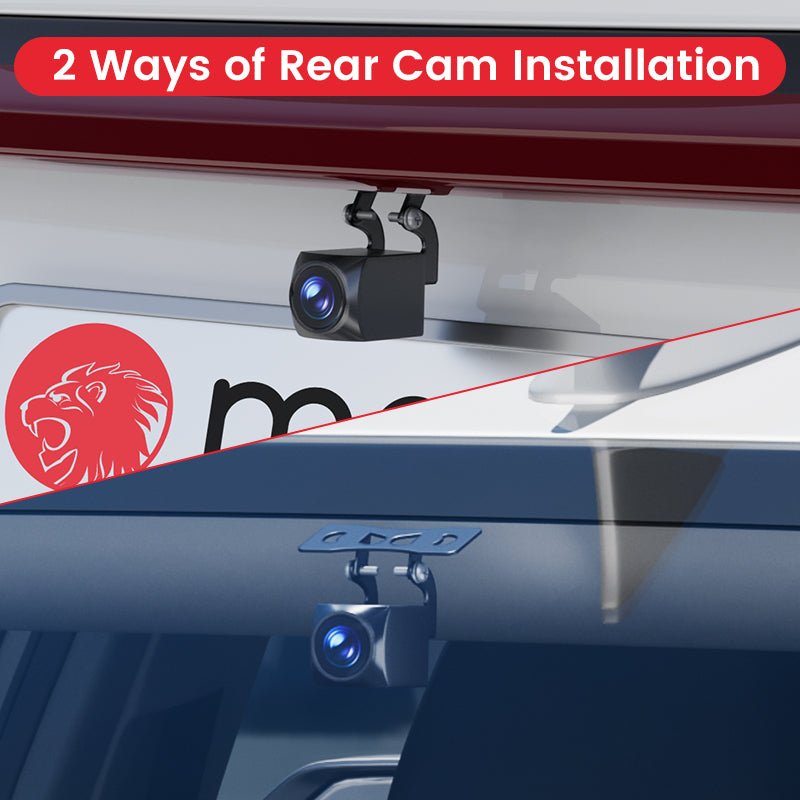
Install The Rear - View Camera
If your mirror dashcam is a dual - camera model, you need to install the rear - view camera. Usually, the rear - view camera is installed at the center of the rear windshield. First, clean the rear - windshield area, then peel off the protective film from the double - sided tape on the rear - view camera and attach it to the rear windshield. Adjust the angle of the rear - view camera lens. Connect the rear - view camera to the main unit of the dashcam with the provided cable, and route the cable along the ceiling, door - frame, and floor to the front of the vehicle.
Power the Mirror

Power Method A: Wire the Power
Difficulty: Easy (DIY-friendly)
Plug the mirror monitor into the cigarette lighter or 12V outlet using the included car charger.

Power Method B: Wire the Power
Difficulty: Moderate (some wiring involved)
Use a fuse tap to connect:
Red wire → ACC (ignition-switched power)
Yellow wire → Constant 12V (for parking mode)
Black wire → Ground (bolt on car frame)

Pair the Cameras
Turn on your car to power the mirror.
The front and rear cameras should auto-pair via 2.4GHz wireless signal.
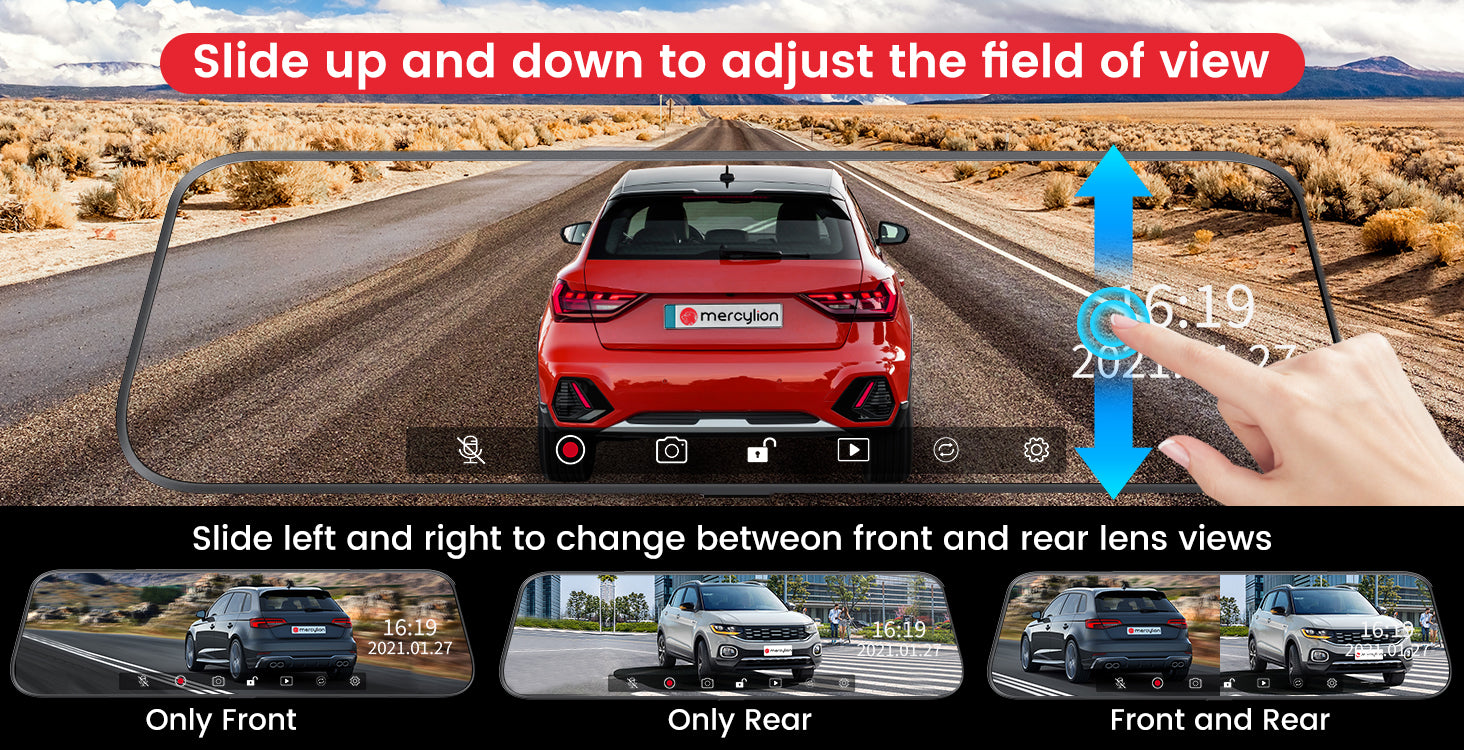
Test and adjust: After connecting the power, turn on the mirror dashcam to check if it is working properly. Adjust the camera angle to ensure that it can clearly capture the front and rear road conditions, and set parameters such as resolution, frame rate, and loop - recording time according to your needs. Use the touchscreen to switch views, adjust parking lines, or toggle recording.

Tips:
Check fuse types in your car (e.g., Micro2, Mini, ATO) before buying fuse taps.
Use zip ties to secure cables and avoid interference with airbags.


