No Products in the Cart
Foreword:
Nowadays, dashcams have become significant tools for vehicle users, offering both peace of mind and valuable evidence in case of accidents or incidents on the road. Installing a dashcam might seem daunting at first, but with the correct guidance, it can be a straightforward process. Here's a step-by-step guide on how to fit a dashcam.
The detailed steps:
1. Choose the high-quality Dashcam: Before diving into installation, ensure you have the high-quality dashcam for your needs. Consider the best dashcam functions such as night vision, video sharpness, parking monitor, SD card internal storage, and so on. Once you've selected a dashcam, read the manufacturer's instructions to get to know the installation process specific to the model.
2. Select an Ideal Mounting Location: The placement of the live dashcam plays a crucial role in its effectiveness. Opt for a spot that offers a clear view of the road ahead without obstructing your line of sight as the driver.
Common mounting locations include behind the rear-view mirror or on the windshield near the center.
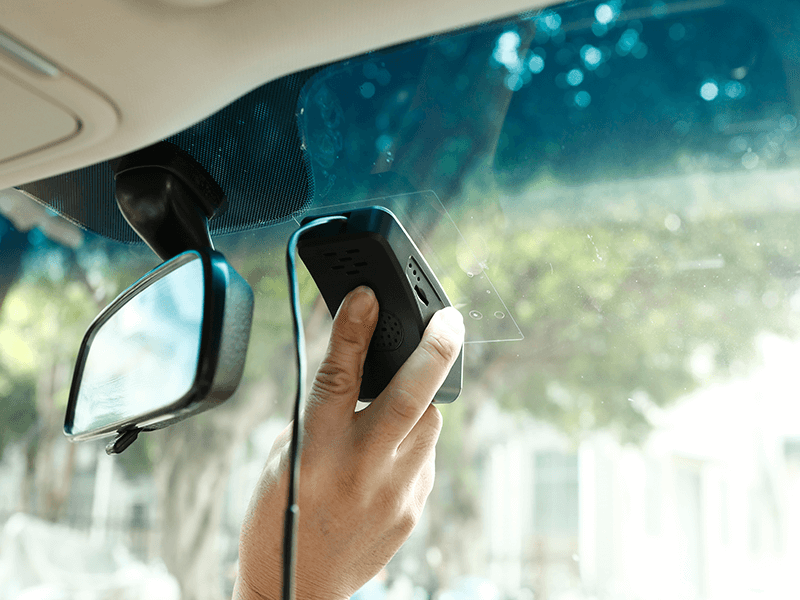
3. Prepare the Mounting Surface: Before attaching the dashcam mount, clean the chosen area on the windshield thoroughly with a glass cleaner. Remove any dirt, dust, or residue that could hinder the adhesive's effectiveness. Ensure the surface is dry before proceeding.

4. Attach the Mount: Most DVR come with a suction cup or adhesive mount for attaching to the windshield. Follow the manufacturer's instructions to securely affix the mount to the chosen location. Press firmly to ensure a strong bond, especially if using adhesive.
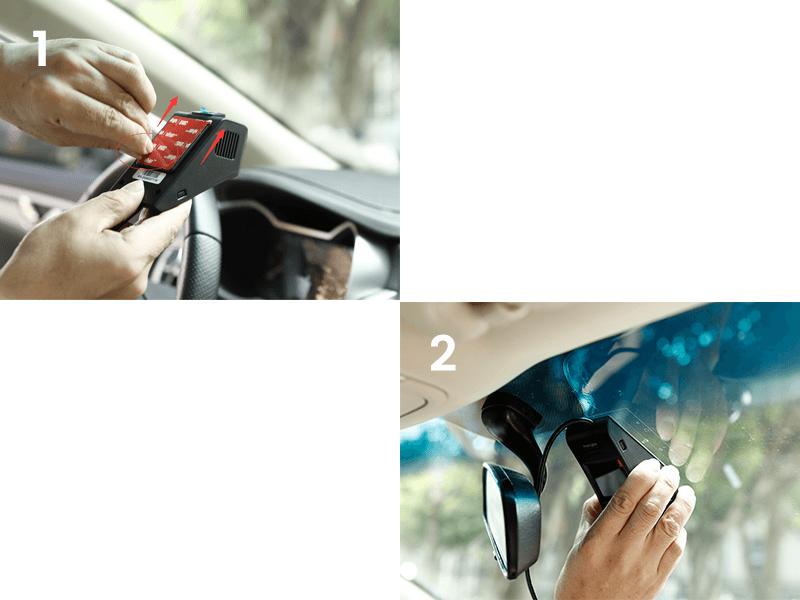
5. Route the Power Cable: Carefully plan the route for the power cable to ensure it doesn't obstruct your view or become a distraction while driving. Many live dashcams come with long power cables to accommodate various vehicle sizes and configurations. Tuck the cable along the windshield's edge or use cable clips to keep it tidy.
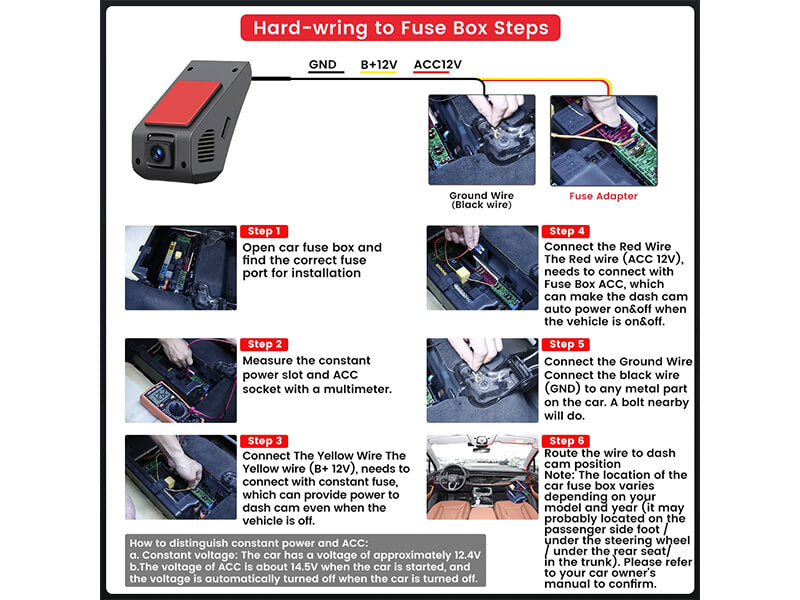
6. Connect the Power Supply: Depending on your dashcam model, you may power it using the vehicle's cigarette lighter socket (12V adapter) or hardwire it for a cleaner installation. If using the cigarette lighter socket, plug the dashcam's power adapter into the socket and route the cable accordingly.
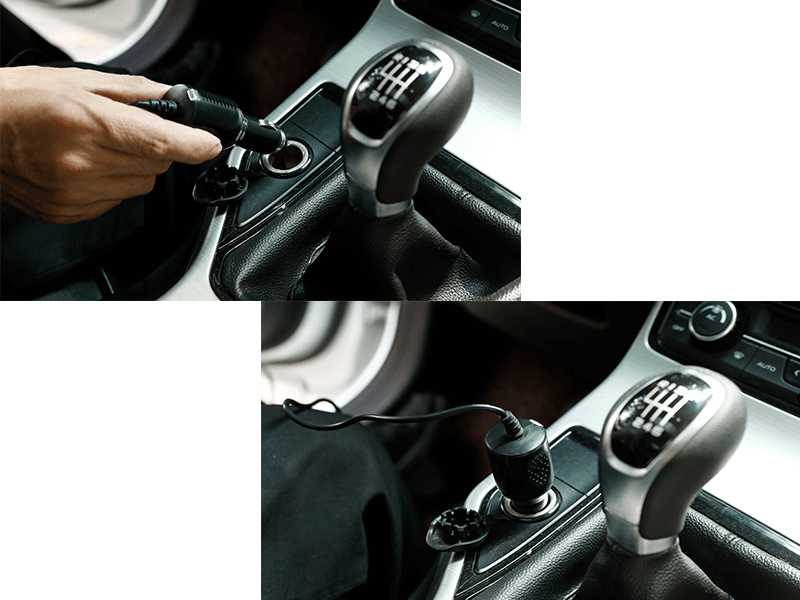
For hardwiring, consult a professional or follow the manufacturer's instructions for safe or correct installation.
7. Adjust Camera Angle and Settings: Once the dashcam is powered on, adjust the camera angle to ensure it captures the desired field of view. Use the live dashcam's settings menu to configure video resolution, looping recording, and any other preferences according to your preferences and local regulations.
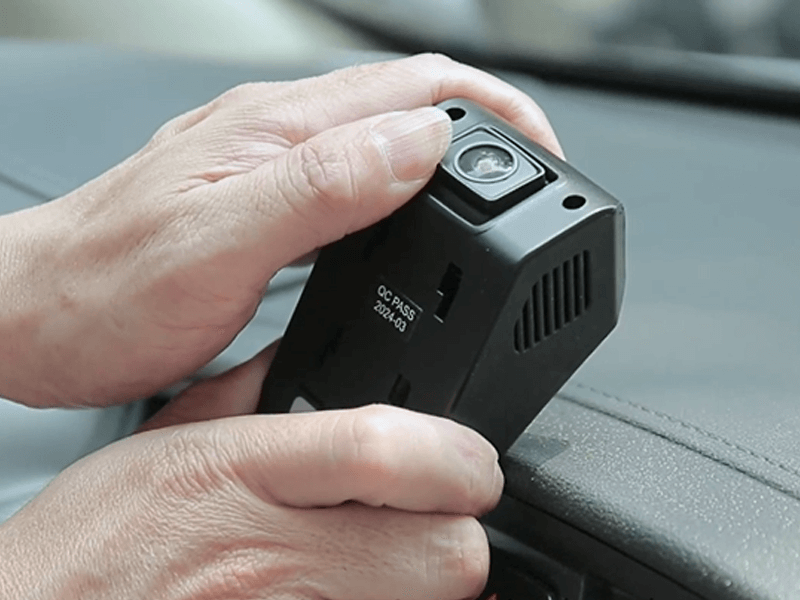
8.Test the Dashcam: Before hitting the road, perform a quick test to ensure the Dashcam is functioning correctly. Verify that it's recording footage, the angle provides a clear view, and there are no issues with power supply or connectivity.
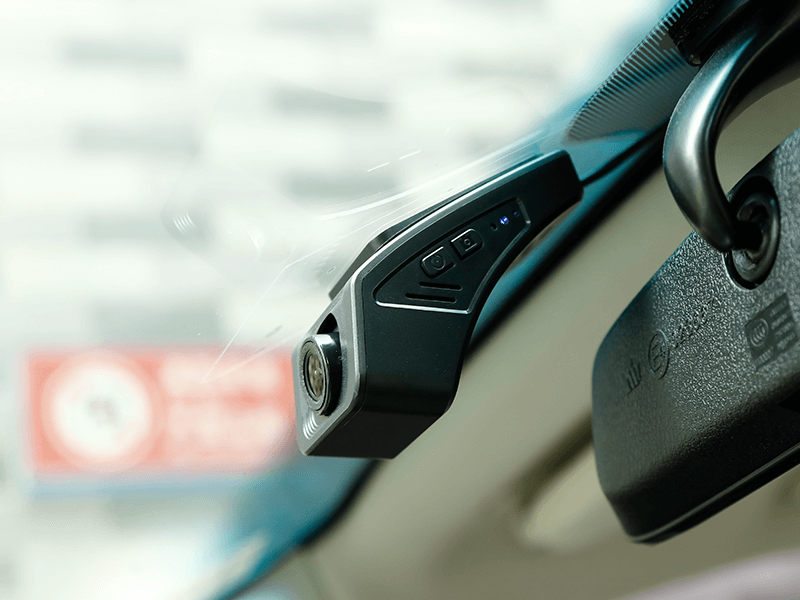
9.Regular Maintenance: Periodically check the dashcam and its mounting to ensure everything remains secure and in working order. Clean the lens and windshield as needed to maintain optimal video quality.
By following these steps, you can successfully fit a dashcam in your vehicle and enjoy the added safety and security it provides on the road. Remember to always drive safely and responsibly, and let your dashcam be your silent witness on the journey.
FAQ about how to fit a dashcam:
Q: How difficult is it to install a dashcam?
A: Installing a dashcam is generally straightforward and doesn't require advanced technical skills. Most dashcams come with user-friendly instructions and mounting accessories, making the installation process accessible to drivers of all levels.
Q: Do I need any special tools to install a dashcam?
A: In most cases, no. Basic tools like a screwdriver or adhesive pads (included with many dashcams) are usually sufficient for installation.
Q: Where should I place my dashcam for optimal performance?
A: Ideally, the dashcam should be mounted behind the rear-view mirror, near the center of the windshield. This position offers a clear view of the road ahead without obstructing the driver's line of sight. Additionally, ensure the camera is mounted securely and that there are no obstructions, such as windshield wipers or sensors, blocking its view.
Q: Can I install a dashcam on my own, or do I need professional assistance?
A: While professional installation services are available, many drivers successfully install their dashcams independently. With clear instructions and basic tools, DIY installation is achievable for most individuals. However, if you're unsure or uncomfortable with the process, seeking professional assistance can provide added peace of mind.
Q: How do I maintain my dashcam after installation?
A: Regular maintenance is essential to ensure optimal performance of your dashcam. This includes periodically checking the camera's alignment and cleaning the lens to prevent dirt or smudges from affecting video quality. Additionally, review footage regularly to identify any issues or anomalies.
Someone purchsed a