Forword:
In an age where technology intersects with safety on our roads, one gadget has become increasingly ubiquitous—the dashcam. Nestled discreetly on dashboards or windshields, dashcams have evolved from niche accessories to must-have tools for drivers worldwide. With their ability to record crucial footage of the road ahead, these unassuming devices have transcended their initial purpose of capturing scenic drives to become indispensable witnesses in moments of uncertainty. Let's delve into the world of dashcams, exploring their evolution, functionality, and the pivotal role they play in modern-day driving.
The best dashcam is a device to makes the car safer, the majority of vehicle owners like, to use dashcams efficiently and high-quality, so it is necessary to understand whether the power it uses is correct, to ensure the DVR works smoothly, which can provide owners with high-quality videos and photos along the way. Have vehicle users ever thought to turn dashcam on in seconds? This article will introduce how to install the dashcam in cigarette lighter. At the same time, it is the way to install THE MERCYLION A970 DASHCAM.
The appearance before install The Mercylion A970 Dashcam:
Step 1: Wipe the location where the Mercylion A970 dashcam will be installed
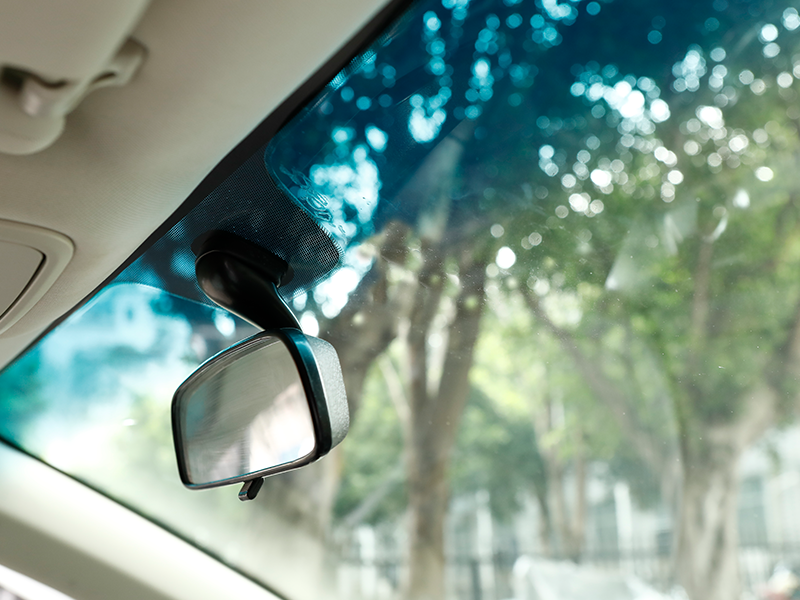
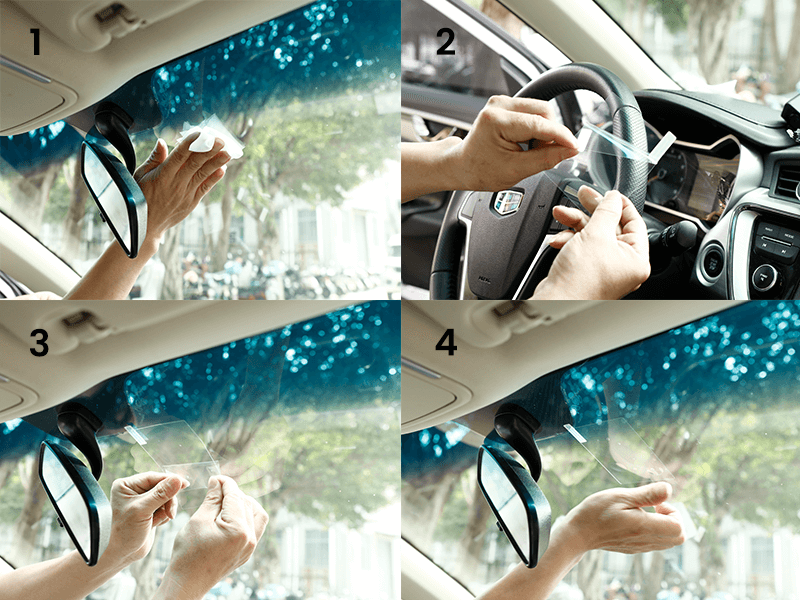
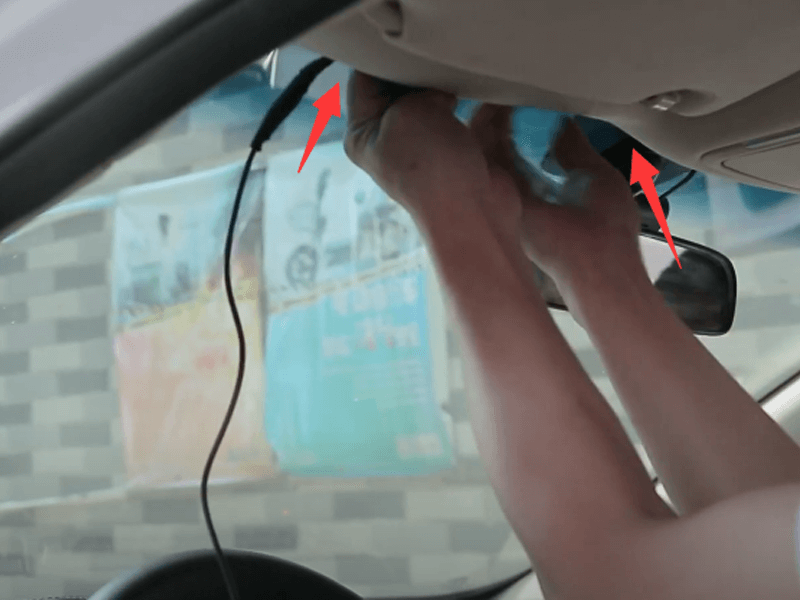
Before installing, dashcam users should wipe the windshield of the car with a dust-free cloth, where to install the location of the car recorder. ( If conditions are limited and there is no dust-free cloth, then using a clean towel or tissue is also correct.) The dashcam install location generally will be located at the rear-view mirror right back side, pay attention to the location should not affect the driver's view of the vehicle, therefore, choose a suitable location to avoid unforeseen situations.
Step 2: Attach the dashcam to the electrostatic tape
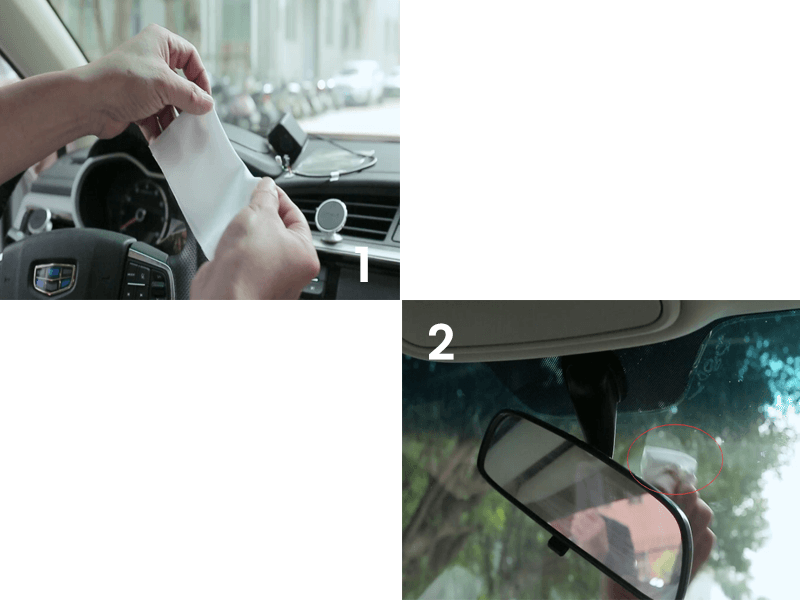
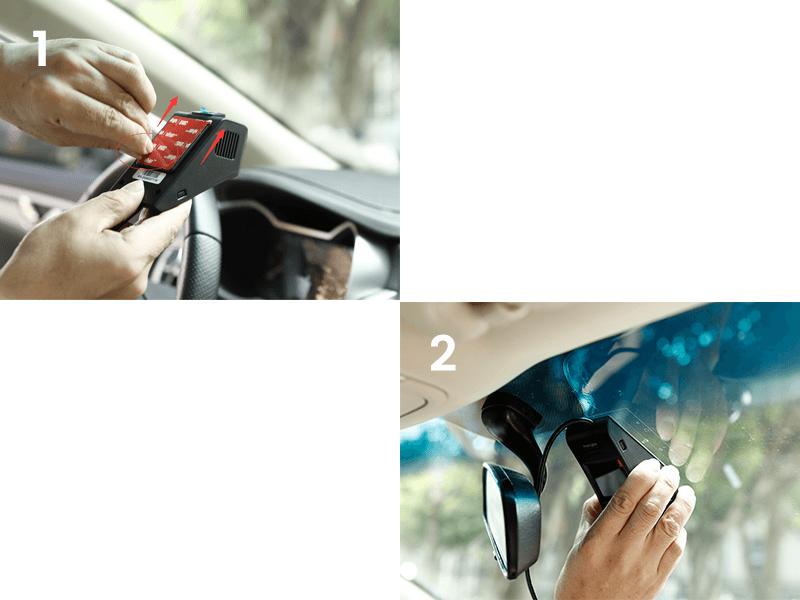
Take out the electrostatic tape in the standard box, and peel off one side of the sticker with your fingers. Put the static sticker on the right rear of the car's rearview mirror, once you're done, press it to make sure it's stuck.
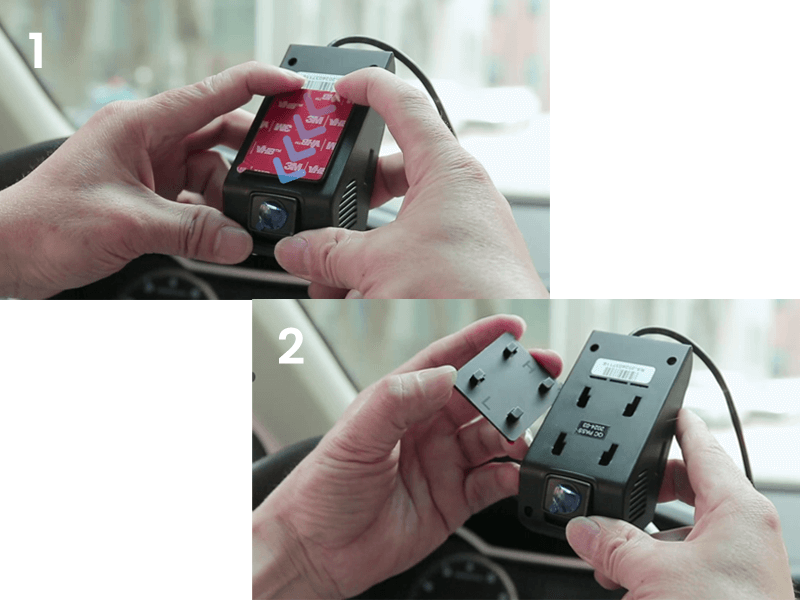
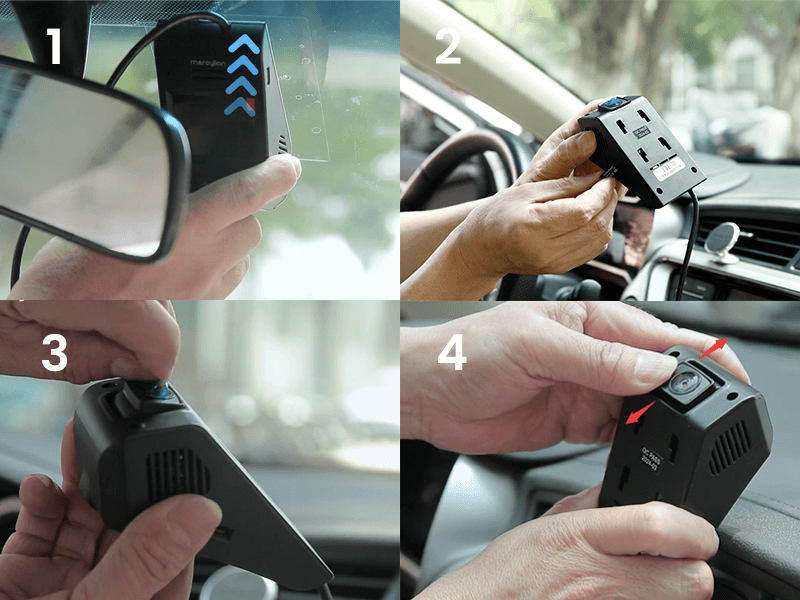
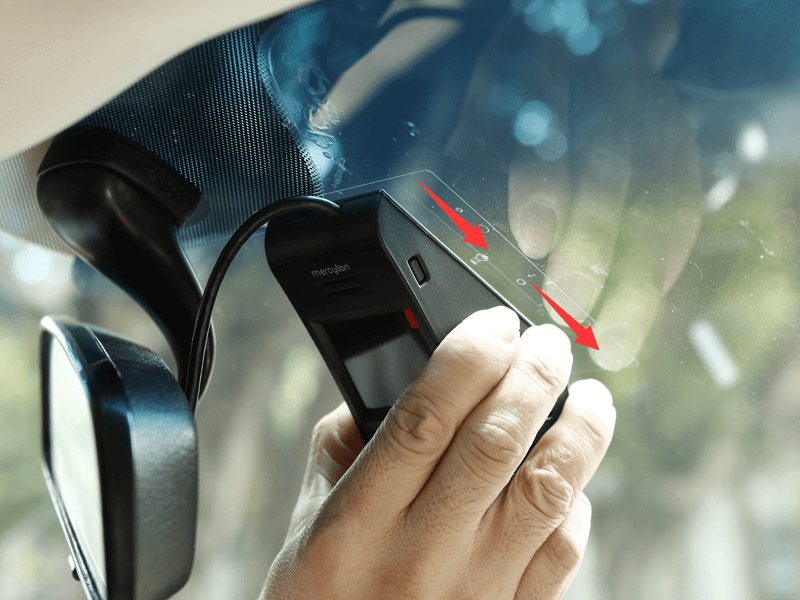
The dashcam base and main host are removable designs, follow the picture's arrow below to remove the dashcam base and main host.
First, peel off the other film of the static sticker. The Mercylion A970 Dashcam comes with 3M glue, then peel off the 3M glue, Use your hand to attach the dash cam to the static tape. Please ensure that the recorder is firmly glued to the electrostatic tape, in case of any problems in the road of the car in the future.
Step 3: This operation is performed after attaching the ESD sticker
After the steps above, use your hand to take down(refer to the below picture's arrow way) the main machine. Take out the SD card inside the standard box. Insert the SD card into the side recess of the A970 dashcam with a clear sound.
Then turn the main machine way to the camera side, and rip the lens protector, to record in focus and free of impurities shield. The Mercylion A970 dashcam lens can adjust the angle users want, this is very convenient that the users can choose to adjust the appropriate lens Angle to record useful video.
Then put the A970 main machine back on the bottom plate as the picture's arrow way.
Step 4: Connect the cable of the dashcam to the cigarette lighter
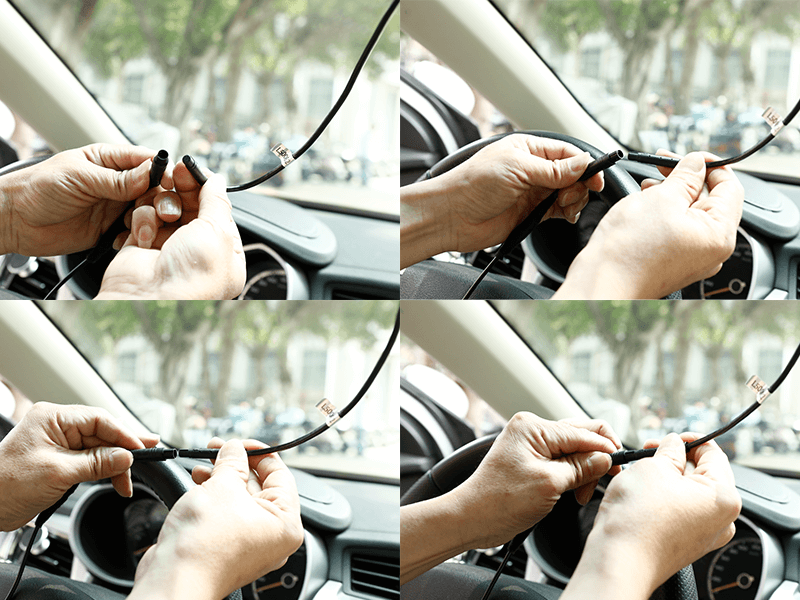
Firstly, take out the cigarette lighter from the standard box, and use both hands to connect the cigarette lighter plug and the live dashcam plug tightly. Then sort out the cables and hide the cable above the windshield.
Step 5: The details of dashcam connect to the cigarette ligter
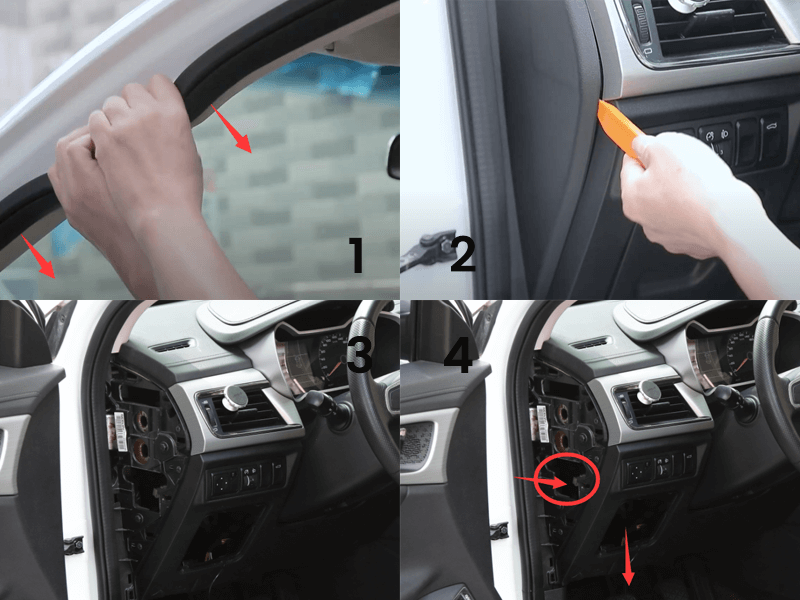
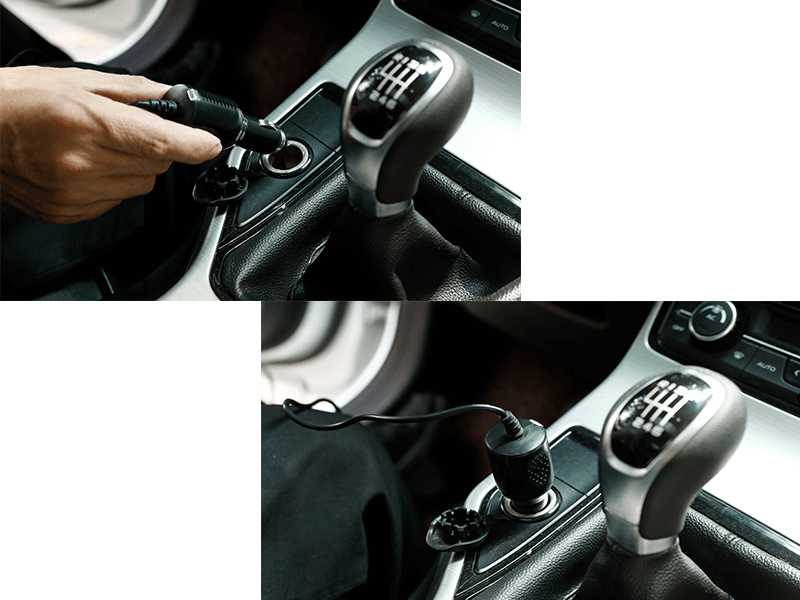
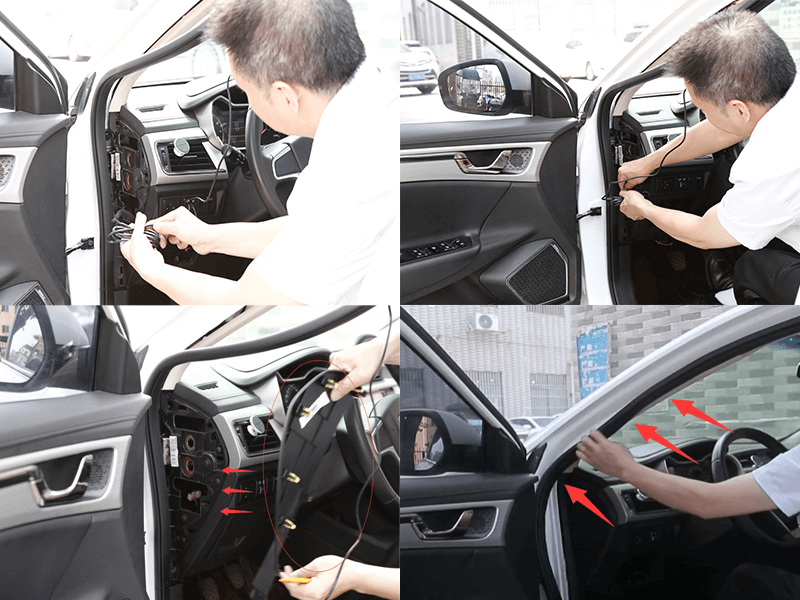
First, remove the vehicle glue with your hands, (warm reminder: If the excess wire can be tucked into the A-post cap, there is no need to remove the A-post cap.) Keep the dash cam hidden. Then take out the pry tool from the standard box, and use the pry tool to pry open the side cover, after removing the lid, you will find a hole near the bottom as below picture. Thread the dash CAM line through this hole, then find the location of the vehicle's cigarette lighter and insert the wire into the cigarette lighter. The connection is now complete.
Step 6: Sort out the cables and install back the side cover
Once the connection is complete, sort out the cables, which means to hide them. Take the side cove back, and install it to the original appearance. Reinstall the strip too.
Step 7: Test if the dashcam is working normally
Now, start the vehicle's engine, and The Mercylion A970 Dashcam will turn on. The dashcam starts recording automatically when the car is turned on. It will turn blue light to flash, which means the dashcam is working normally.
That is all the installation for The Mercylion A970 Dashcam.
Final thoughts:
If the above installation process does not inspire users, then watch the below website, hope it will make a difference.
