No Products in the Cart

 German
 French
 Italian

Dashcams have become an essential accessory for modern vehicles, enhancing safety and providing valuable evidence in case of accidents or incidents.
If you're a proud owner of a Porsche Macan and want to equip it with front and rear dashcams, you're in the right place.
In this guide, we'll walk you through two methods about dashcam installation porsche, using the Mercylion A40 front and rear Dashcam: a Plug-and-Play Rain Sensor Install and a Fuse Box Hard-wiring Install.
However, A40 integrated dash camera Porsche is not only compatible with Porsche Macan 2019, but also fit with the porsche related models as list below:
Paramera 2016-2017
Cayman 2016-2024
Taycan 2020
911;918
etc,
 |
 |
Car dashcam installation doesn't have to be complicated. The Mercylion A40 offers a convenient Plug-and-Play option that utilizes your Porsche Macan's rain sensor housing. This method ensures a seamless integration without compromising the aesthetics of your vehicle. To help you with this installation, you can follow the steps outlined in this video:
Step 1: Prepare Your Vehicle
Prepare you Porshche and ensure your vehicle is parked in a safe location.
Step 2: Gather Your Materials
Before you start, ensure you have all the necessary tools and materials:
Mercylion A40 front and rear Dashcam Kit
Trim removal tools
MicroSD card (for dashcam storage)
Above are all in one in the mercylion A40 dashcam package.

Step 3: Access the Rain Sensor Housing:
Start by turning off your Porsche Macan for safety.
Locate the position to install, for oem-looking dashcam is easy to find the place to install, usually the oem-looking dashcam is to replace the original car rain sensor housing, which is behind the rear-view mirror, in the center of the front window, and does not block the eyesight. No need to worry about break-ins and violating the laws of dashcam installation.

Use trim removal tools to gently pry off the rain sensor cover. Be careful not to damage the cover or the surrounding area.
 |
 |
 |
Step 4: Install the front camera
Take out the front of the dashcam, insert the storage card into the card slot on the side of the camera, and then remove the protective film from the lens.
 |
 |
Before wiring, first disassemble the connection line of the block pointed by the pencil in the figure, because one end of the plug-and-play line will need to be connected to this place.
 |
 |
Take out the plug-and-play cable(Y shape), Pass one end of the Y-shaped line (as shown in the following figure) through the middle isolation plastic through the gap, connect the this end of Y cable to the this plastic block we just disassemble.
 |
 |
 |
 |
The largest end of the Y-shaped line is connected to the connecting wire that we separated from the plastic block at the beginning. The last end of the Y-shaped line is connected to the front camera of the recorder.
 |
 |
A40 is a left and right structure, dividing them into two parts
 |
 |
Then put it back to the back of the rearview mirror according to the left and right structure, fix the left side first, and then close the right side.
 |
 |
After organizing the wiring harness, cover back the large rear housing. If you buy the GPS version or the front and rear cam version. Remember to pull aside the GPS connection end or the cable end of the rear camera which is waiting for the connection. The front cam of the A40 is installed and finished.
 |
 |
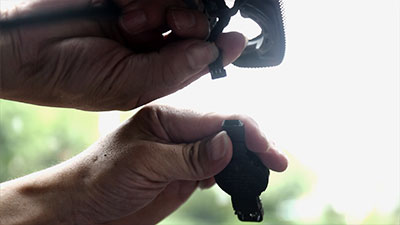
Step 5: If you buy the Dashcam GPS, install the GPS
Follow the installation from step 4. Prepare GPS and tools: Obtain the GPS device to be installed and a cleaning cloth.
Connect GPS: Connect the GPS cable to the GPS port cable of the dashcam
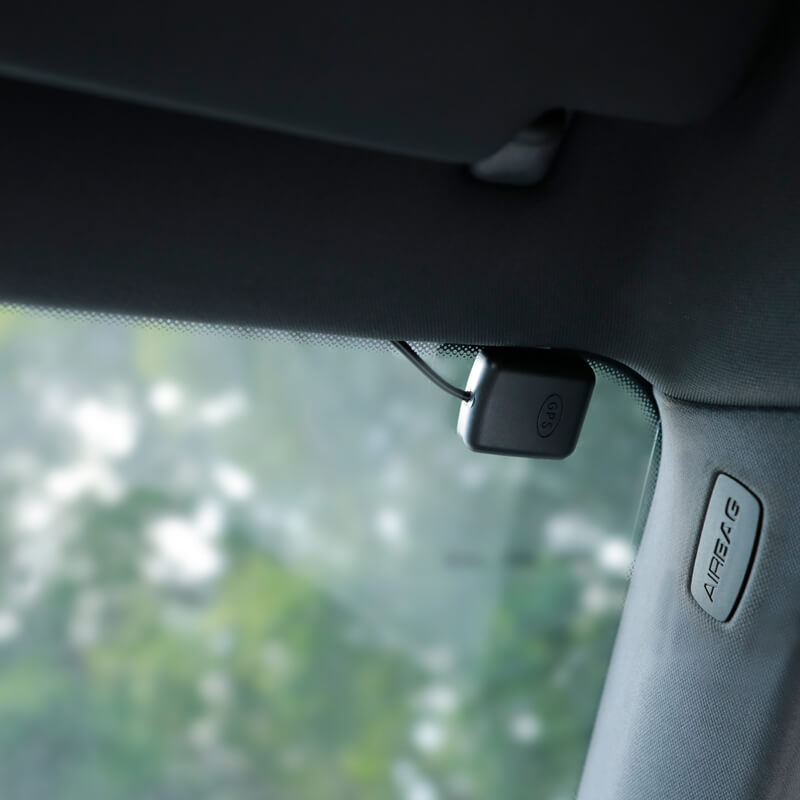
Determine the installation location: Guide the GPS cable from the edge of the roof to the upper corner of the windshield of the passenger seat.
Clean the surface: Clean the location to be installed, making sure the windshield surface is clean and dust-free.
Prepare the GPS sticking place: Tear off the 3M glue on the GPS device.
Paste the GPS: Paste the GPS device gently on the predetermined position of the windshield.
Completing the installation: The GPS is successfully installed on the windshield, make sure it is solid and secure.

Through the above steps and installation instructions, you can more directly understand the installation process of GPS.
Step 6: If you buy the A40 front and rear cam version, install the rear cam
Follow the installation from step 4. Insert the rear camera cable of the recorder into the extension cable of the rear camera and hide it in the gap of the car roof.
 |
 |
 |
 |
Here, you can choose to disassemble the A-pillar and pass the rear extension line over the airbag.

*path of install the rear cam
Follow the path shown in the above figure and route the rear extension line along the A-pillars, B-pillars, and C-pillars. Connect the extension cable of the rear camera and the plug of the rear camera.
 |
 |
 |
 |
Clean the rear windshield with a cleaning cloth, as shown in the figure.
 |
 |
 |
 |
 |
 |
Tear off the 3M tape of the rear camera, install it in the middle above the windshield, organize and hide the wires, and finally the wires at the root of the rear camera can be fixed with tape.
Step 7: Start the vehicle to check if the power on
Now we have installed the front and back cameras, let's start the car to see if the recorder can work normally. After starting the car, the recorder's blue light flashes, indicating that the recorder is recording normally.
 |
 |
Step 8: Install the Mercylion APP to View and Download the Video
You can download the mercylion app from app store or google play.

Or scan the QR code from the pictures below:
 |
 |
| IOS | Android |
The dash cam has WiFi interconnection function, and terminal devices such as smart phones and tablet computers can view/control the dash cam through WiFi.
After the dash cam is powered on, the WiFi will be turned on by itself; after the WiFi is turned on, the dash cam will act as a WiFi hotspot.
① Enter the DVR Menu Press the ‘Wi-Fi connect’ button on the app for connection.
② Default WiFi name: VT5004-**** and the Password: 12345678
The password is required for the first connection, and it is not required for the subsequent connection of the app software.

MERCYLION APP INTERFACE OVERVIEW
If you can see both the front and rear views after connecting to the app, it means that your front and rear installation is correct

Above we have introduced the steps to plug-and-play to the rain sensor and separated install the single-channel and dual-channel recorders respectively. The following introduces the steps and methods for connecting power through a fuse box and installing single-channel and dual-channel recorders.
In fact, these two installation methods are basically the same. The only difference is the power connection method. Here we only introduce the method of connecting the fuse box with the S015 power cord. The remaining installation steps are the same as above.
S015 Cable hard-wring overview

Note: for the convenience of installation, the fuse box power wire is upgraded and optimized. The wire has its own ACC converter. During installation, it is only necessary to onnect the constant power and ground wire to the fuse box near the glove box of the front door. When the car starts, the recorder works normally, and when the car is turned off, the recorder is turned off after a delay of 2 minutes.
If you choose the method of wiring to the fuse box, continue the previous installation method from step 4.
The status of the fuse box power cord waiting to be connected to the fuse box slot is as shown in the figure below.
 |
 |
 |
 |
We used a pry tool to pry open the cover on the side of the passenger seat. Then let us use the multimeter to find out the BATT+ slot. Take out the multimeter and turn the dial of the multimeter clockwise to the 20V position.
|
|
 |
 |
 |
 |
 |
We use the red pen and black pen of the multimeter to touch the constant power slot and negative positions respectively, and let other people help you start the car. If the multimeter shows that it can reach 13~14V, then the position measured by the red pen is the constant slot position of the fuse box. We connect the S015 yellow wire to the constant power slot position and the black wire to the grounding. Then the wiring of S015 has been completed.
The wiring of the power cord of the fuse box has been completed. For other installation steps, please refer to the above mentioned parts and will not be repeated again. This article is for reference only. It is recommended to seek professional installation or on-site guidance.
In the end
Elevate your driving experience with Mercylion's built-in integrated dash cams, meticulously crafted to seamlessly blend with a wide range of luxury vehicle brands, including Mercedes Benz, BMW, Audi, Porsche, Land Rover, Cadillac, Volkswagen, Toyota, Lexus, Tesla, Volvo, Honda, Ford, Lincoln, Buick, Infiniti, Peugeot, and more. Our dash cams effortlessly integrate into your vehicle's rearview mirror, offering not only reliability in capturing high-quality video, images, and precise location data but also delivering a factory-finish aesthetic that complements your vehicle's original style.
We also support external GPS functions, and some styles even support built-in GPS functions, which is a feature that is currently not available in the market for the other OEM-Looking dashcam brands.
Experience the convenience of a plug-and-play installation process, making it exceptionally user-friendly. Don't miss out on enhancing your driving safety and security. Invest in Mercylion's integrated dash cams today and drive with confidence.


