No Products in the Cart

 German
 French
 Italian

Now more and more car owners pursue built-in dashcams, and these kinds of dashcams are seamlessly integrated into the vehicle's design. They don't require additional mounts and can result in a cleaner and more aesthetically pleasing look.
If you shop VW Passat's built-in dashcam on Mercylion, the installation process is likely to be less involved compared to adding an aftermarket dashcam. However, the specific steps can vary depending on the model year and the dashcam system your vehicle is equipped with. Here's a general vw passat b8 dash cam hardwire that may help you:
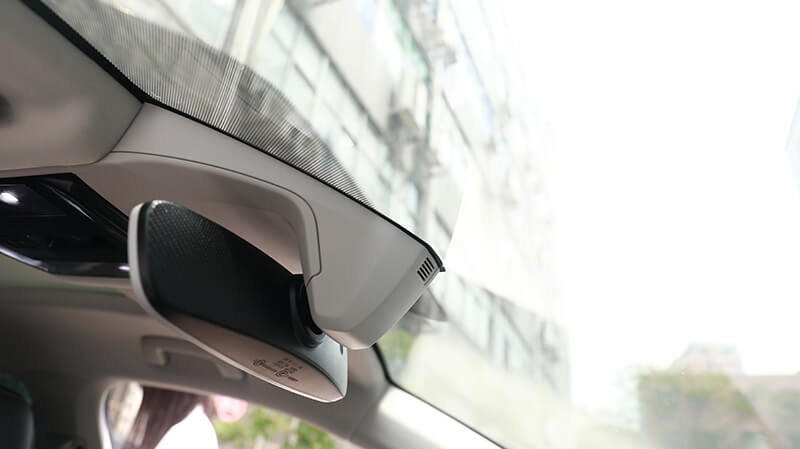
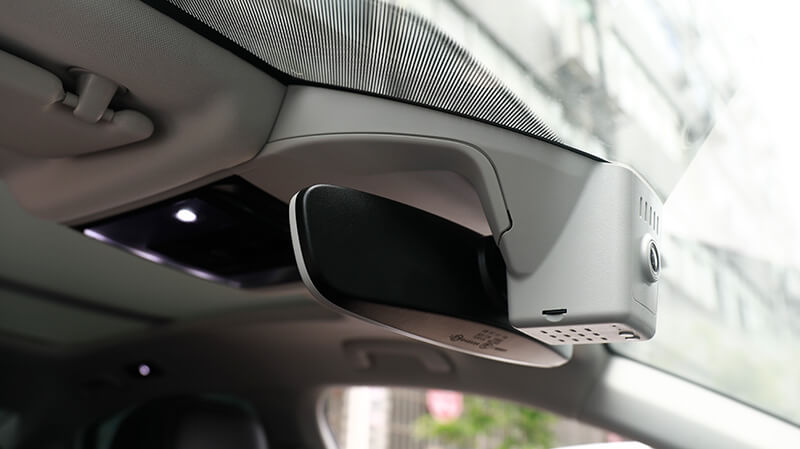
Locate the Built-in Dashcam:
Identify the location of your VW built-in dashcam. It is integrated into the rearview mirror. See the VW Passat dashcam before installation below:
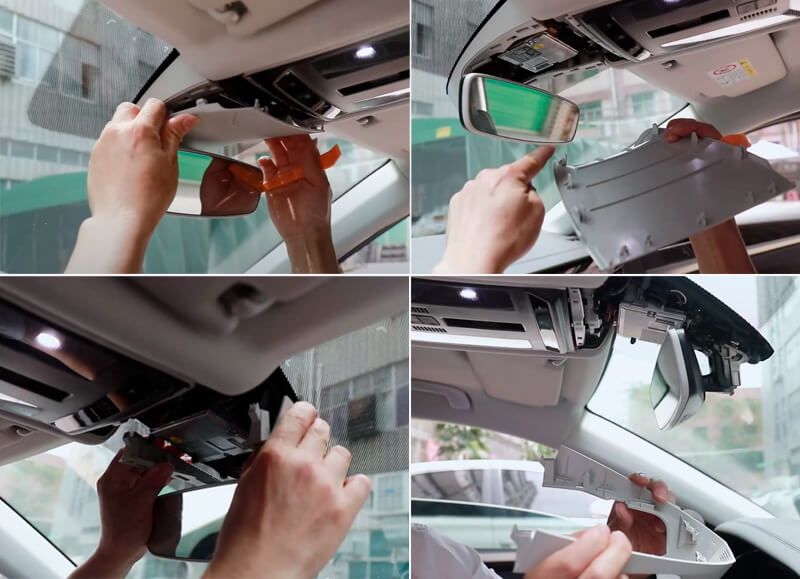
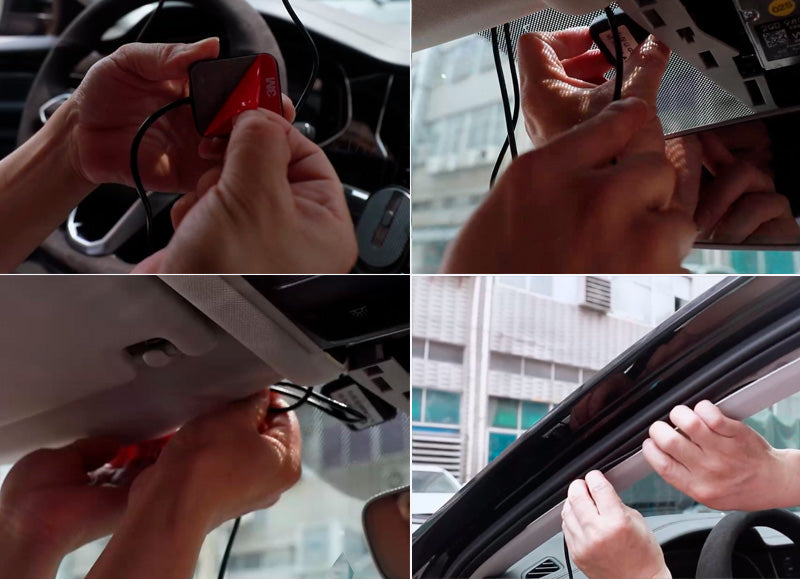
Remove the Original VW Passat Rear-view Mirror Casing
Remove the rear-view mirror housing with the pry tool. Getting your fingers into the right spots in the rearview mirror housing. Take off the back cover first, keep it and we need it to combine with the dashcam later. After removing the cover plate from the back, note that there is also an outer shell surrounding the root here. In the same way, we need to take it off. Pay attention to the fact that there are many buckles here. Don’t use too much force to avoid the buckles being torn apart by brute force.
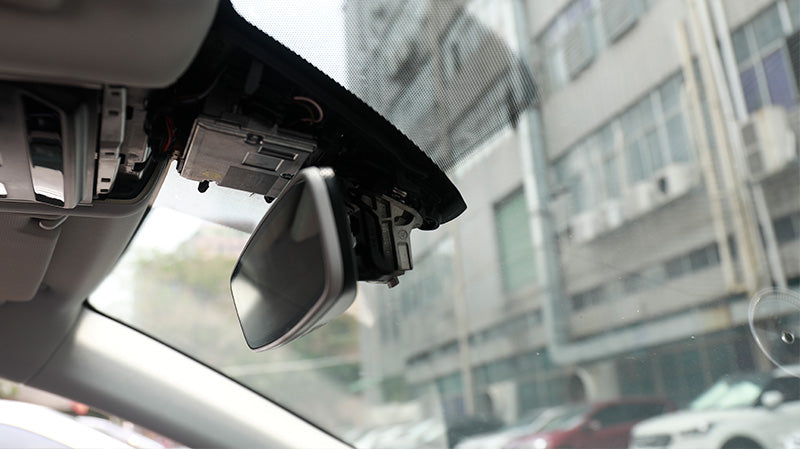
This is the picture show the original casing after remove.
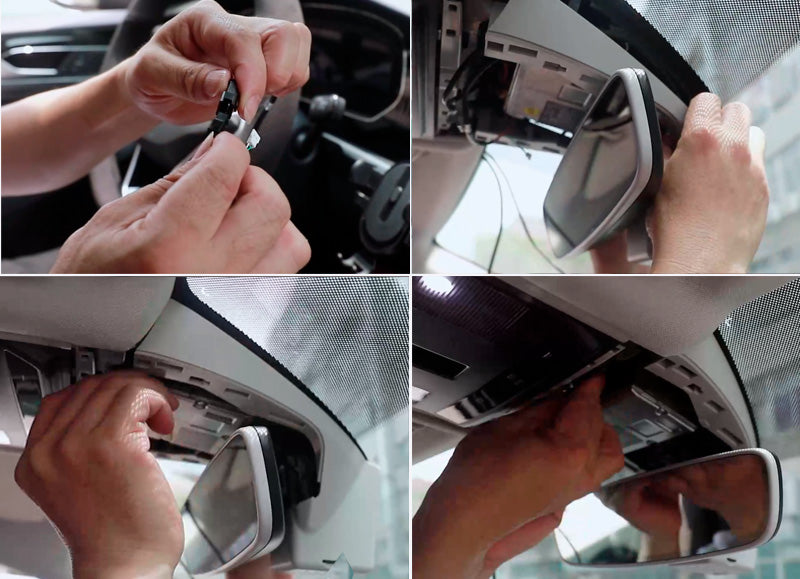
Mount the front Camera for VW Passat
We need to put the dashcam in the place we just removed. Before that, let us connect the some wires first.
Connect the GPS module with the Dashcam

The GPS feature allows the dashcam to record the vehicle's longitude-latitude, speed, etc. along with video footage.
Connect the dashcam power cable with the rain sensor cable(is a short cable like Y shape in the package)
Align the recorder with the buckle position of the original vehicle and install it. After the recorder is installed and fixed, organize the wiring harness and hide it in the gap.
Install the GPS module
Mount it on the windshield near the dashcam. Route the antenna cable along with the power cable and connect it to the dashcam.
Wiring the dashcam power cable to the Fuse Box
Find the fuse box place, check the driver's side footwell: The fuse box is commonly located on the driver's side of the car, Look for a plastic cover that can be removed to access the fuse box. Some car' fuse box place is underneath the dashboard or in the footwell area, it is depends on different car model and model year. You can check the owner's manual of your car.
Thread the power cord through the side, as shown in the second right corner of the following image
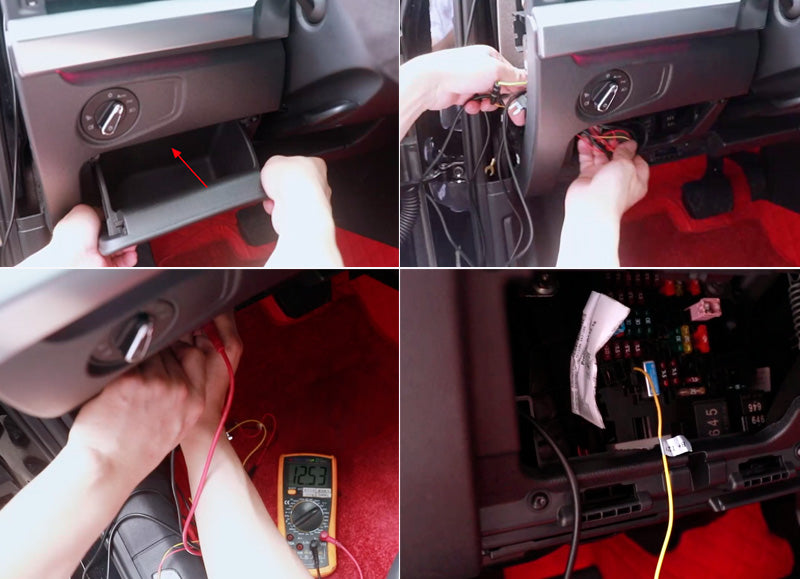
Measuring voltage and connect the wire.
Before measuring voltage and wiring for the car recorder using the fuse box, it is important to ensure that you have the necessary electrical knowledge and safety awareness. If you are unsure or unfamiliar with electrical operations, it is advisable to seek assistance from a professional or technician to help you with the following steps.
Measuring voltage: a. Prepare a digital voltmeter (multimeter). b. Make sure the vehicle's ignition switch is in the off position. c. Select an appropriate power line in the circuit, such as an accessory power or constant power. Connect the positive and negative leads of the voltmeter to that power line. d. Set the digital voltmeter to direct current voltage (DCV) and choose the appropriate range. e. Turn on the vehicle's ignition switch and observe and record the reading on the digital voltmeter. This will display the power supply voltage you are measuring.
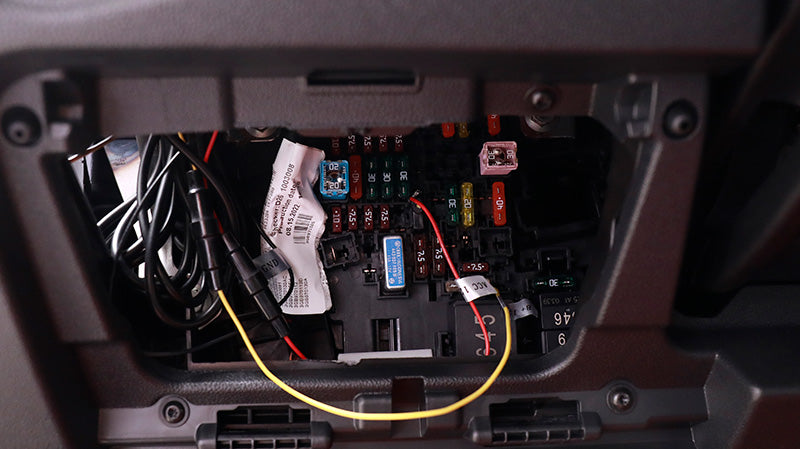
The connection method of power cables and video cable. This dash cam has
three power cables, and the connection method is as follows:
| Wiring | Definition | Function |
|---|---|---|
|
Yellow wire |
12V Constant Power | Connect to the positive electrode of the car battery (BATT+) |
| Red | ACC 12V | Connected to vehicle ACC power supply; When ACC is 12V, the dash cam is powered on |
|
Black wire |
GND | Grounding; connect to the negative pole of the car battery and ground |
Sort out the wire, and cover the driver side plate, and put back the fuse box wire cover.
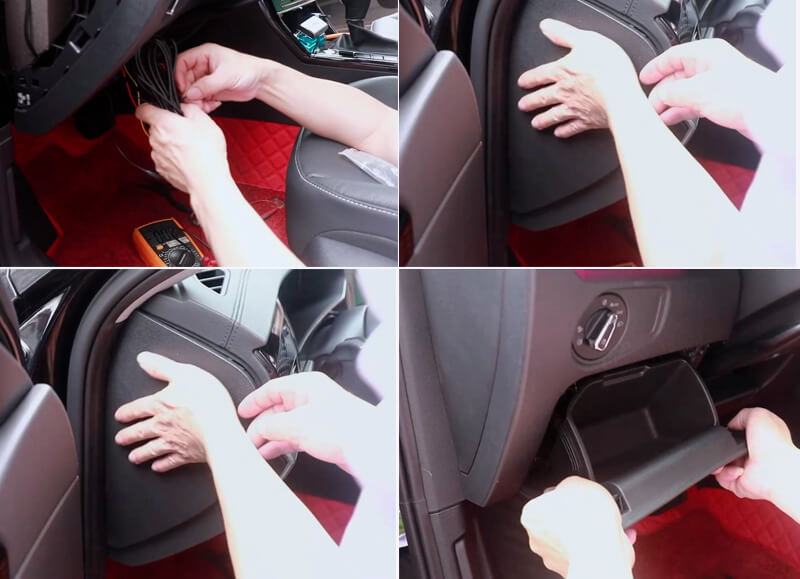
Dash Camera Install Finish
Start the car, the dashcam's blue light is flashing, dashcam is installed finish.
More detail install dashcam steps check the dashcam installation video below
MERCYLION Wifi Connection APP operation
Download the App: scan the QR code to download the Mercylion app for your phone, or search "mercylion" in the app store or Google Player to download
Power On the Dashcam: Start your car, if the dashcam indicator light is bule then the dashcam working normally
Connect to Dashcam's Wi-Fi:
a. On your smartphone, go to your Wi-Fi settings.
b. Look for the Wi-Fi network name (VT5004) that matches your dashcam's model
c. Select and connect to the dashcam's Wi-Fi network.
d. You may be prompted to enter a password(default password, "12345678"). Check your dashcam's manual for the default password, or it may be labeled on the dashcam itself.
Open the Mercylion App: Launch the dedicated app you download.
Configure Settings:
Once connected, you can configure settings, such as video resolution, recording settings, and Wi-Fi password, through the app.
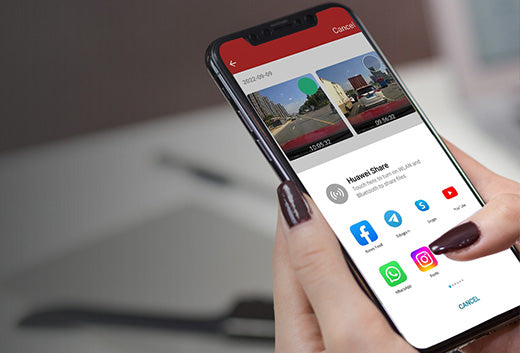
View and Transfer Footage:
You can use the app to view live or recorded footage.
Transfer video clips or images to your smartphone for easy sharing or storage.
Live Streaming
You can use the app to access a live view from the camera while the vehicle is parked.
Security Considerations:
Change the default Wi-Fi password on your dashcam to enhance security. This prevents unauthorized access to your dashcam.


