No Products in the Cart

 German
 French
 Italian

Introduction
Dash cameras have become an essential accessory for many drivers, providing a crucial layer of security and convenience on the road. The MERCYLION V2000 4K Dash Camera is a popular choice among commuters due to its 4K ultra high-resolution recording capabilities, GPS function show the longitude-latitude, speed, etc when playback the video.Do you think GPS function is essential in your life, if yes, it's essential to hard-wire it into your vehicle. In this article, we will guide you through the process of hard-wiring your V2000 4K dashcam with parking mode, ensuring you get the best performance and peace of mind.
Tools and Materials Needed
1 V2000 dashcam
1 multimeter
1Pry tool
Prepare the Vehicle: Start by disconnecting the vehicle's battery to ensure safety during the installation process. This step is crucial to prevent any electrical mishaps.
Install Steps
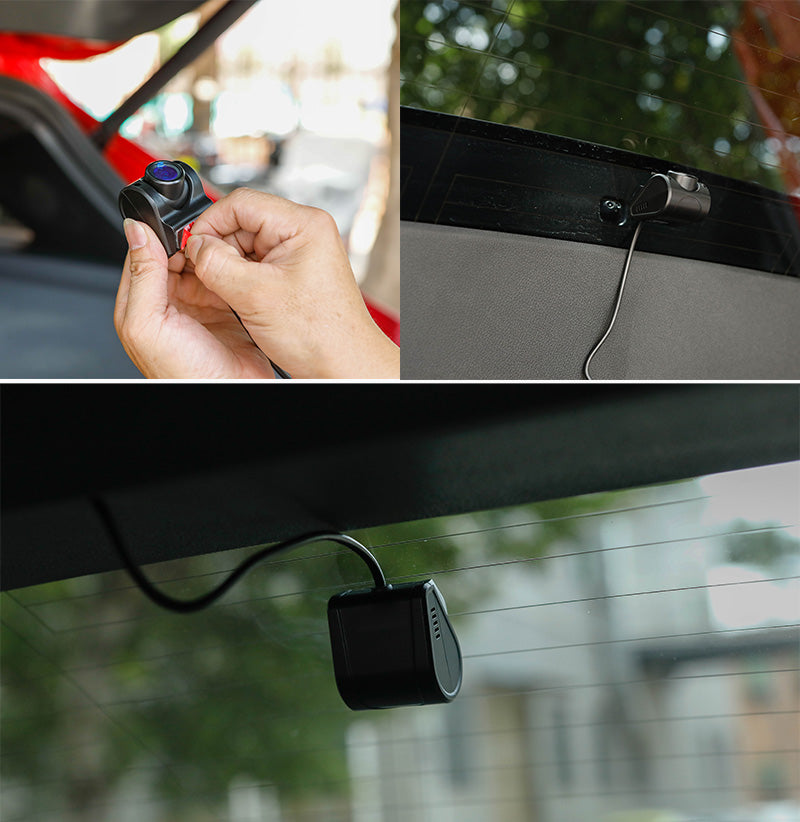
Step 1: Mount the V2000 Dash Camera
Before mounting the dashcam, choose a suitable location on your windshield. Consider local laws and regulations that may dictate where you can place the dashcam.Generally speaking, ensure it has a clear view of the road ahead and, if applicable, the rear window. Proper placement is crucial for optimal recording.
Step 2: Clean the Windshield
Use a clean cloth to clean the inside of your windshield thoroughly. Remove any dirt, dust, or oil that could affect the adhesion of the dashcam mount.
Step 3: Adhesive Mount the Dashcam
Remove the 3M film from the adhesive side of the mount and the lens protective film. Carefully place the adhesive side of the mount on the cleaned windshield and attach the dashcam to it. Apply firm pressure to ensure a strong bond.(ps. the host and the bracket mount can be seperated, which is convinient to take down the main machine alone.)
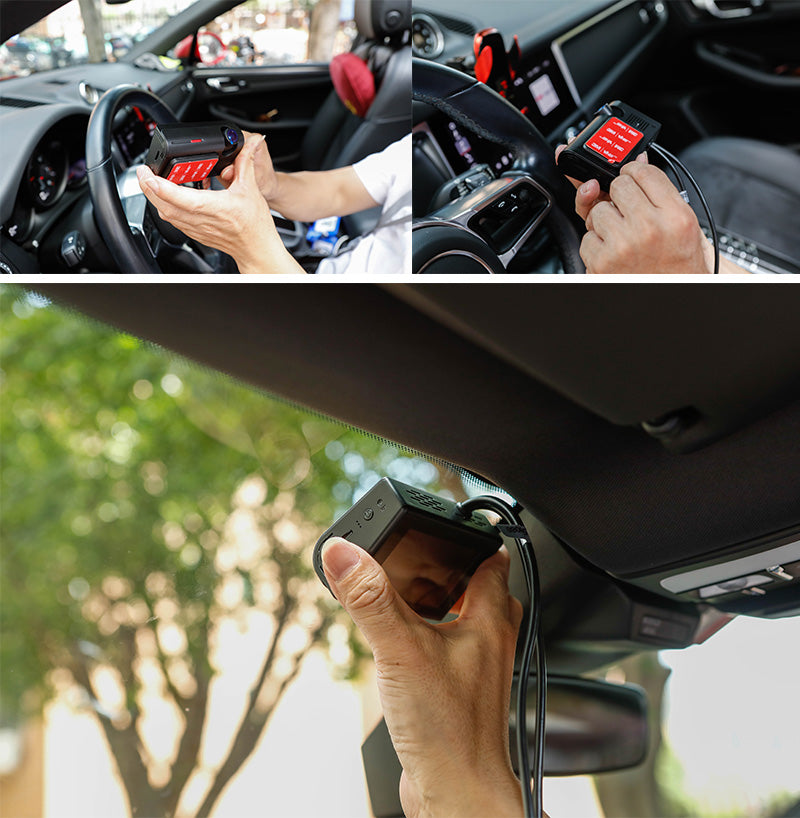
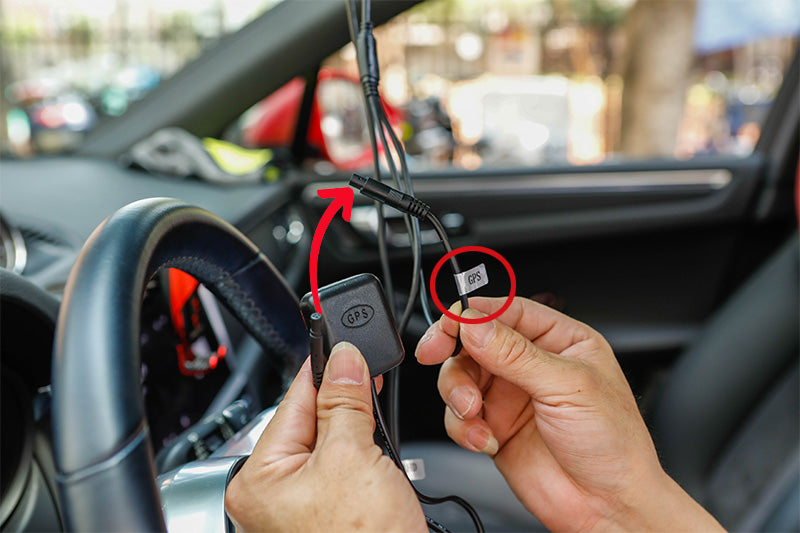
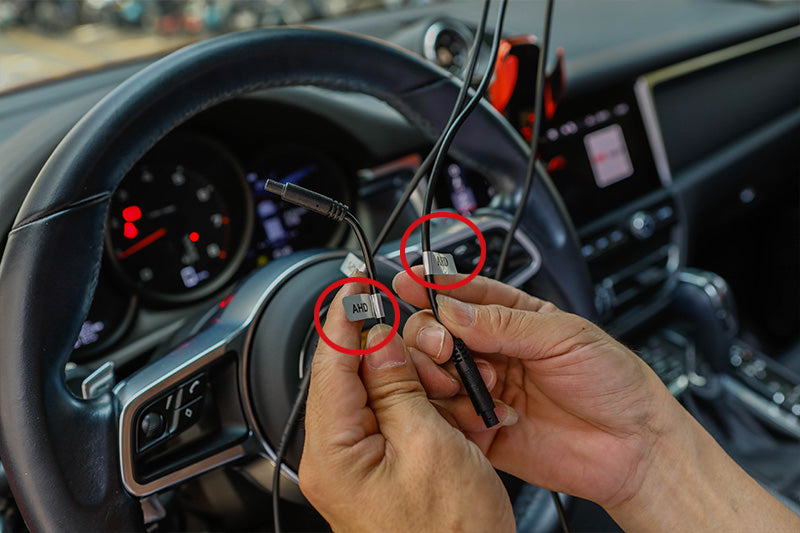
Step 4: Connect the Extenal GPS Module, Rear cam wire to the host
Take out the GPS Module and connect to the V2000 dashcam.Find the wire which mark with GPS label and connect.
Then connect the rear cam wire to the V2000 main host. That is connect the cable which mark with AHD label.
Step 5: Route and hide the wires
Sort out the GPS wire and the rear view, and route it along the roof and hide in the roof gap.
When reach the upper left side of the windshield, wipe the glass here, stick the electrostatic sticker on the glass, then tear off the 3M glue of the GPS, and stick the GPS on the static sticker, the GPS module install finished.
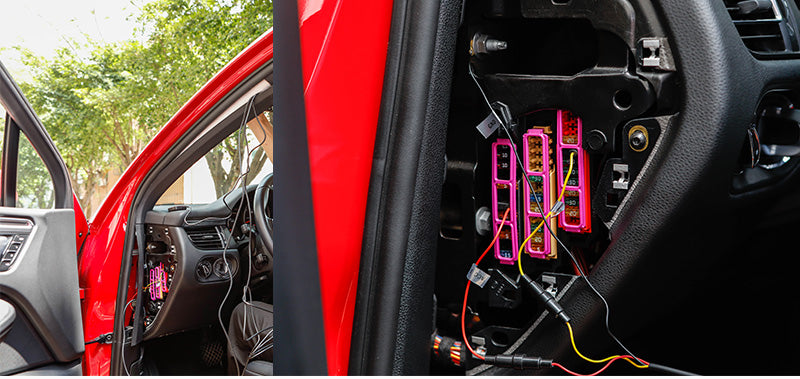
Step 6: Route the power cable to the fuse box
Carefully open the A pillar and route the power cable along the A pillor to the fuse box place, in this machine, the fuse box is locate in the left side of the driver seat.
Then use a multimeter to measure the power positive pole, ACC slot and grounding place.
Select a fuse slot that is only active when the vehicle is in use. This ensures that the camera will turn on and off with the ignition. Using a fuse tap or add-a-fuse kit, insert the camera's red wire into the chosen fuse slot. This step is critical for proper parking mode functionality.
Find a suitable grounding point near the fuse box for the black wire. Ensure it is a bare metal surface, free from paint or rust, and securely attach the wire.
The connection method of the step-down power supply line, the driving recorder has three power supply lines, the connection method is as follows:
| Wiring | Definition | Function |
|---|---|---|
| Yellow wire | 12V Constant Power | Connect to the positive electrode of the car battery (BATT+) |
|
Red wire |
ACC 12V | Connect to vehicle ACC power supply; when ACC is 12V, the driving recorder is energized to work |
|
Black wire |
GND | Grounding; connect to the negative pole of the car battery and ground |
PS. We still have plug-and-play power connection for option,that is 5V car charging power line connection method: 1. The car charger is connected to the
cigarette lighter 2. The power supply is connected to the car charger and the device end respectively.
Step 7: Secure the Wiring
Neatly route the wires from the dash camera to the fuse box and ground point, tucking them away to avoid interfering with the driver's view or any moving parts. Use wire clips or adhesive cable organizers to keep the wires tidy. Finaly, put the left side panel back.
Step 7: Route the rear cam and install
Next, let us continue to route the rear cam wire to the rear window,to convient to view, the routine shown as the pictures below, since the wiring of the recorder runs towards the driver's side, it can be understood that this diagram corresponds to the opposite direction.

Peel off the rear cam's 3M adhesive, wipe the rear window and install the rear dashcam.
Step 8: Test the Dashcam
Turn on your vehicle and check if the dashcam powers up and starts recording. If not, consult the mercylion services.
Install Video Instruction
In Conclusion
With your front dashcam securely mounted and correctly configured, you can enjoy the benefits of enhanced safety and documentation of your journeys. Remember to periodically check and clean the dashcam to ensure optimal performance.


