No Products in the Cart
If Mercedes owners have been looking for a lightweight, plug-and-play, hidden dashcam; MERCYLION OEM-style dashcam is quite suitable for these owners. Owners don’t need to worry about any subsequent handling of traffic accidents, because the Mercylion A10 dashcam will keep the owner's evidence video to assist in claim settlement. If Mercedes owners have no idea how to install, let’s follow the below instructions. Here will show how MERCYLION OEM-Style be installed on the Mercedes E300 2019.
The appearance of the original car rain shell of Mercedes E300 2019.
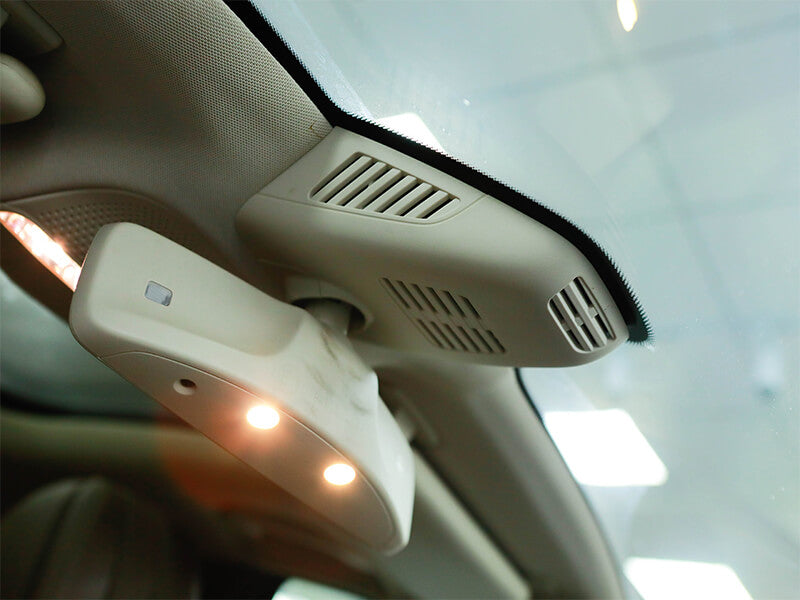
First, the Mercylion Dashcam A10 is designed and made 1:1 according to the original vehicle's rear-view mirror housing. Therefore, owners do not need to worry about the original vehicle's rear-view mirror shell prototype instead, it’s as simple and beautiful as the vehicle's original one. Before the installation, pay attention to turning off your Mercedes vehicle, it’s essential to ensure your safety and avoid electrical problems during installation.
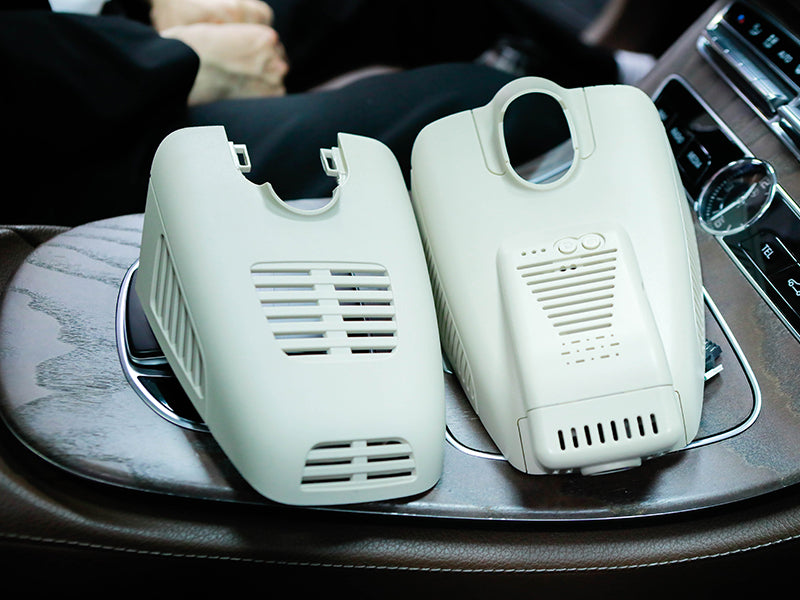
Step 1:Removing the Vehicle's Original Rear View Mirror Housing
First, use the fingernail to move the vehicle's original rear-view mirror housing down to the right. Pulling along the direction of the arrow instruction picture.
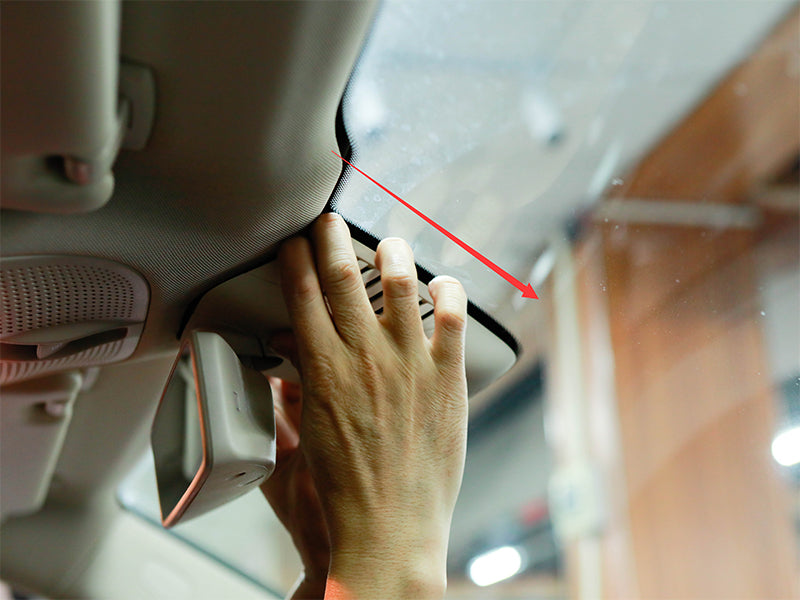
After this operation, a little gap emerges, which is behind the vehicle’s rear-view mirror and in the middle of the original car rain-sensing enclosure. Find this gap, using a pry bar to pry open this small lid. Then take it down with great care, which avoids damaging another tiny component. Remember to preserve it well, it will be used later.
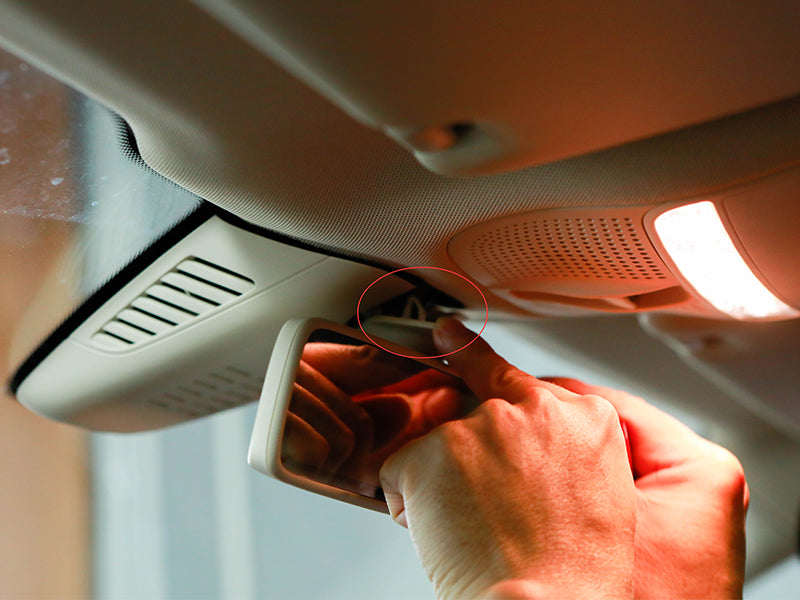
Step 2:Take down the vehicle's original rain-sensing shell
Following step 1’s operation, it’s quite easy to use a pry tool to pry open along the gap between the windshield and the rain-sensing shell. Taking down the casing carefully, the original rain-sensing shell had already been removed.
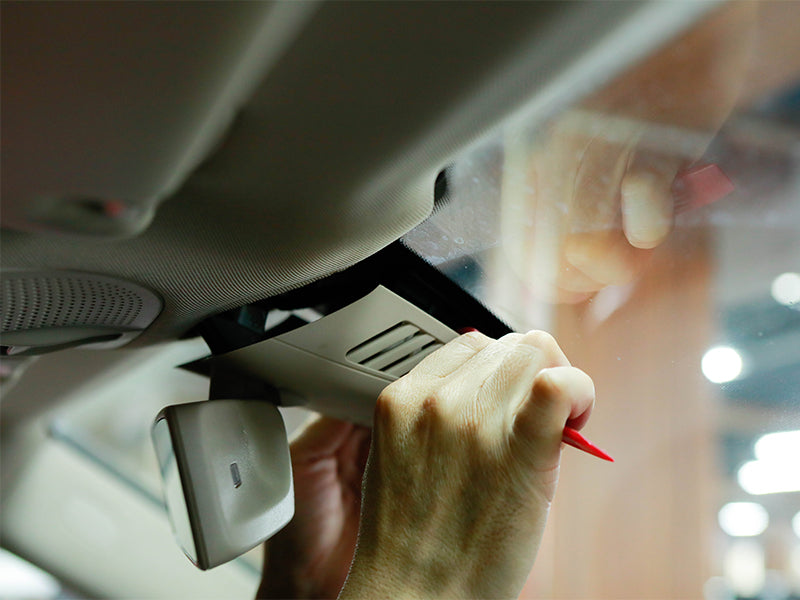
Step 3:Remove the original vehicle rain sensor cable
After detaching the original rain-sensing shell, the original vehicle rain sensor cable is exposed obviously. Using the pry tool insert the gap just below the cable, Then use your fingers to pull the cable out with the force of a pry bar.
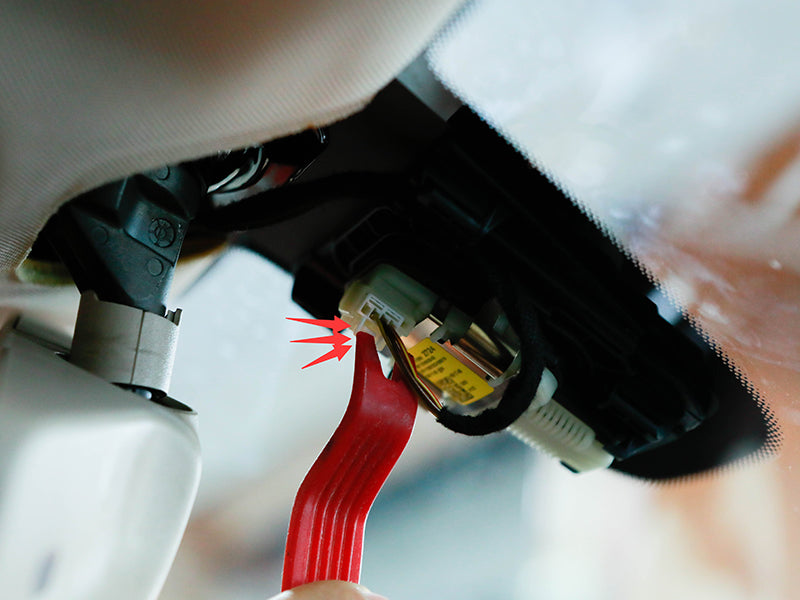
Step 4:Rain sensor power cable’s (Y shape) installation
Firstly, find out the rain sensor power(Y shape) from the standard boxing, which can refer to the following figure.
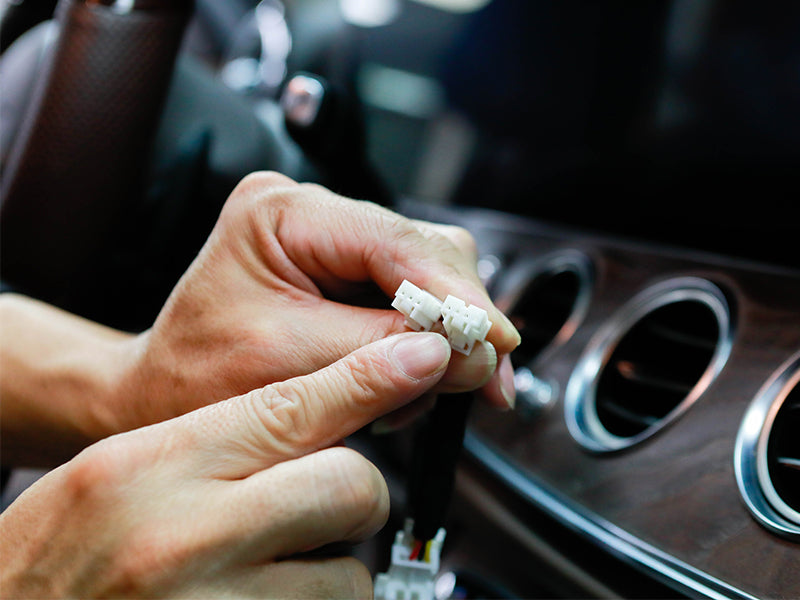
The rain sensor cable is divided into 2 sides, one has 2 plugs, and the other has only have 1 plug. Using the side with only 1 plug, insert it gently into the rain sensor slot we unplug just now. Then use the vehicle's original rain sensor cable connector inset to the Y-shaped cable slot. After following all the above operations, sort out the wires along the top.
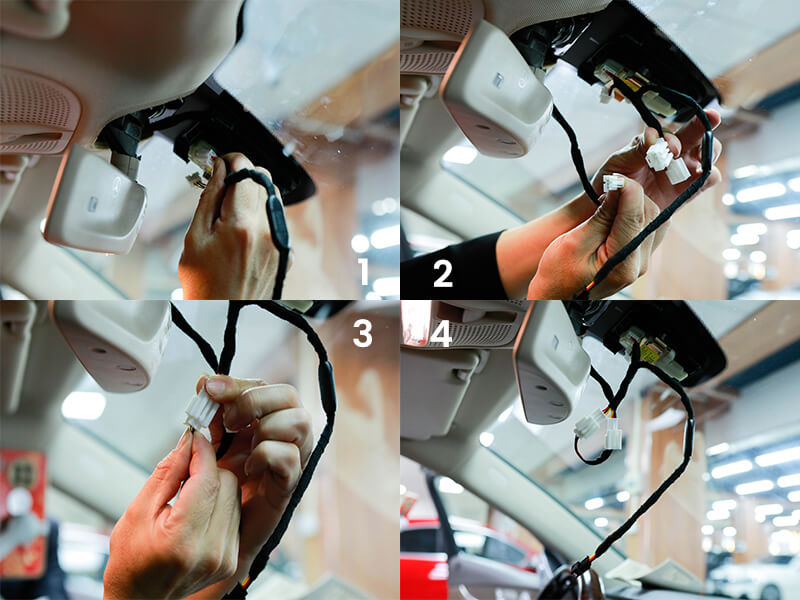
Step 5:Insert MERCYLION Dashcam cable
You will find that there exists an obvious wire hung in the air, which is the last cable for the Y-shaped cable. Now use the dashcam connector to connect to the Y cable end slot. Picking up the MERCYLION OEM-Looking dashcam, turn to the camera side, please remember to peel off the lens protective film, or it may affect the subsequent functions of video recording and photography of the fit dashcam. On the contrary, this behavior will make the frames more clean and clear.
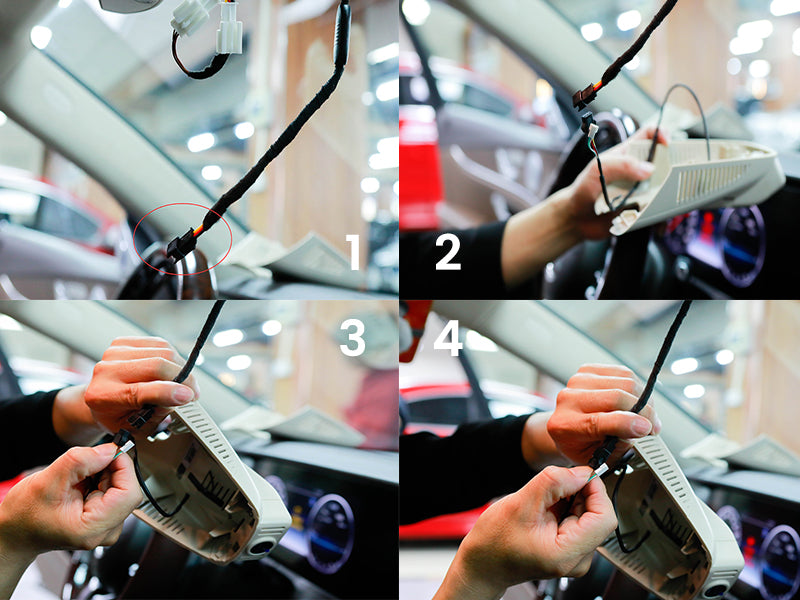
After finish these steps,sort out the wires again, in order to hide the wires and keep tidy.
Step 6:Install MERCYLION OEM-Style dashcam shell and little lid
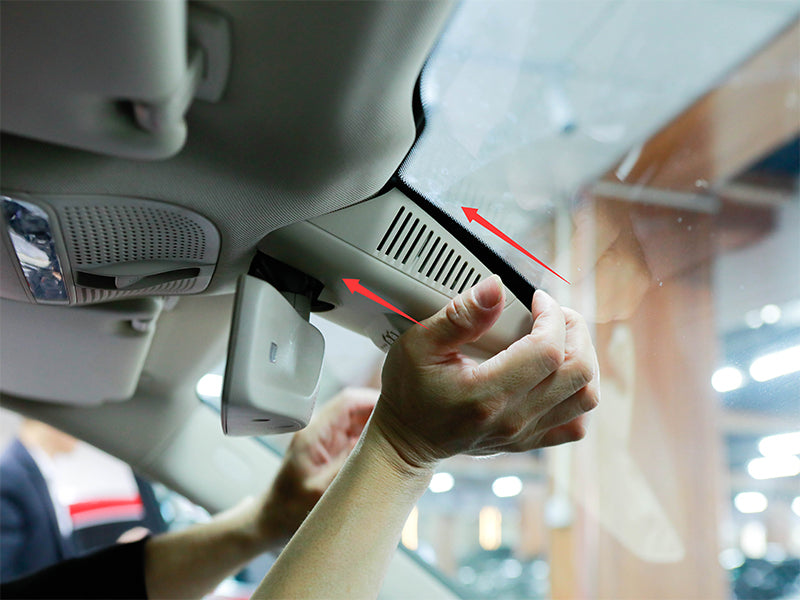
Promise the wires to be sorted out clean, then pick up the MERCYLION OEM-Style dashcam shell. Coving back the dashcam and push upward. You will find that the shell cannot perfectly fit in, where there exists a gap. Here is a tip: Hold the front of the shell(with the camera side), and push hard just like arrow ways. Don’t forget the little lid above the rear-view mirror, cover the back gently, and Be careful not to damage any interior component.
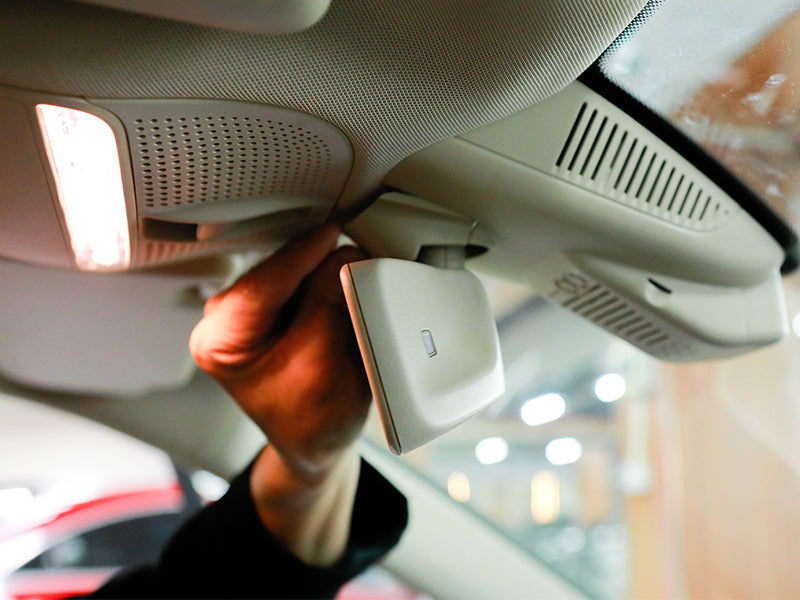
Check if the shell and the little lid have already been covered back correctly.
Step 7:Insert the SD card into the Dashcam
Inserting the SD card gently, which with a crisp sound, now the dashcam install is finished.
Final thoughts:
It’s advisable to install a Mercedes built-in dash cam. This is a double guarantee, not only for Mercedes users but also for the Mercedes vehicle itself. Mercedes users can take this guidance for reference, which can correctly direct installation. If you can’t get inspiration from the above steps, please mind the video below, it includes more install details, which were all shot step by step. If encounter any professional install issues, please consult professional help without hesitation.
If you are also a Mercedes owner, it's so delighted that Mercylion dashcam also fit in Mercedes GLC260/GLC200/18 C200/15-19 C180L/16-19 C260/GLC300/16 C200L/19 200Coupe and so on. If you want to choose the best fit one for your Mercedes vehicle, please contact with Mercylion's official email(info@mercylion.com.) and attach to your car's original rain sensor, Mercylion will reply the suitable dashcam for you as soon as possible.
Someone purchsed a